How to read Dolomites trail signs and plan a hike
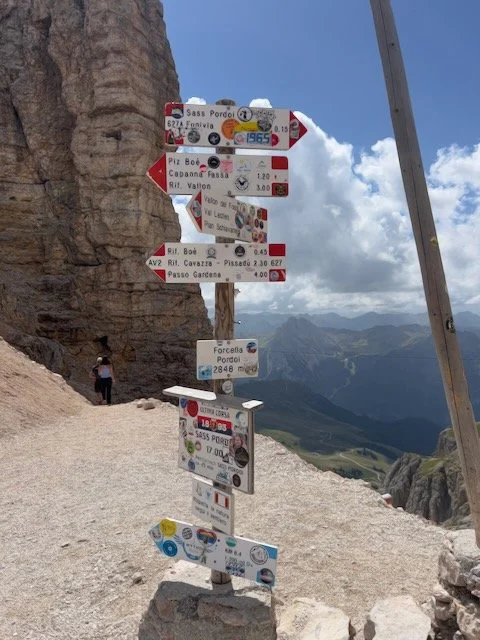
The quickest way to turn an easy Dolomites walk into a stressful afternoon is to follow a sign to a place you recognise without checking where that path goes next.
I've been walking in the Dolomites since 2010, and I still stop at junctions to check the trail number and my map. The signs are useful. They don't plan the whole day for you.
Here's how I put a route together before I leave the hotel, and what I look for when I'm actually on the trail.
Start with a route, not a photograph
A photograph tells you where somebody stood for ten seconds. It doesn't tell you which lift they took, how long they walked, or how they got back.
Before choosing a hike, I find its starting point and finish, the distance, the ascent and descent, the terrain, and an estimated walking time. Then I check how I'm getting to the start and back from the finish.
An out-and-back is straightforward. A point-to-point walk may need a bus or a different lift. A loop can still be hard if it has a long, steep descent.
This is something I wish more people understood before their first trip. My First Trip to the Dolomites guide covers some of the other things that regularly surprise first-time visitors.
If the plan depends on a lift, I check that lift's dates and last descent for my travel dates. This matters especially in autumn, when different lifts can close on different days.
My Dolomites Cable Cars Guide explains how I use lifts when planning hiking days and why the lift schedule needs to be part of the plan from the beginning.
I also leave enough time for lunch and stops. A route described as three hours of walking isn't necessarily a three-hour outing.
What the trail sign is actually telling you
At a typical junction, look for the destination and the numbered path.
Some signs also give an estimated walking time.
That time usually gets you to the place named on the sign, not around your entire planned circuit and back to the hotel.
The number is often more useful than the place name when several destinations share a path. Note the number you need for the next section, then check it again when the route branches.
A destination can appear under its Italian, German or Ladin name, so a second name on the map doesn't always mean you've found the wrong place.
Don't assume every sign lists the same destinations or gives a time.
At a complicated junction, take a minute to match the sign, the trail number and your map before setting off.
My simple trail-sign routine
I save a map of the route for offline use before I leave, including the way down or back.
At the trailhead I confirm that the sign points to my first waypoint and that the number matches the route I saved.
At each junction, I check again.
If the trail splits and neither option looks right, I stop there rather than walking on and hoping it sorts itself out.
This sounds fussy until you reach a sign with four arrows, two huts and a village name you weren't expecting.
Then it takes about thirty seconds and makes the rest of the walk much calmer.
The map still matters
Trail signs help you make the next decision.
A map shows how that decision affects the rest of the day.
It can show a climb after lunch, a long descent to the car or a path that ends somewhere other than the lift you came up on.
This is why I don't plan hikes in isolation. Where you're staying, how you're reaching the trail, lift times and what comes before and after the hike all matter.
My How to Plan a Dolomites Trip guide explains the order I use when putting those pieces together.
I carry an offline map on my phone and enough battery to use it.
I also check the weather and tell someone my intended route.
If conditions change or the route feels beyond my comfort level, I turn back.
In an emergency in Italy, call 112.
Start simple
For a first trip, I would begin with a clearly marked walk that returns to the same place, then get more ambitious once the signs and terrain feel familiar.
You don't need to memorise a network of trails.
You do need to know your next waypoint and how you're getting home.
And before choosing the hike, make sure it actually makes sense from where you're staying. My Best Bases in the Dolomites guide explains why your base has such a big effect on the days you can realistically plan.
Planning your own Dolomites trip?
Trail signs help once you are already on the mountain. The bigger work happens before that: choosing the right base, grouping your days logically, checking lift access and making sure each hike actually works from where you are staying.
My DIY Dolomites Itinerary Toolkit walks you through that planning process step by step, using the same order I use when building trips for clients.
If you want personalized help instead, my trip planning services can help you choose the right bases, structure your days and build a realistic itinerary around your travel style.
